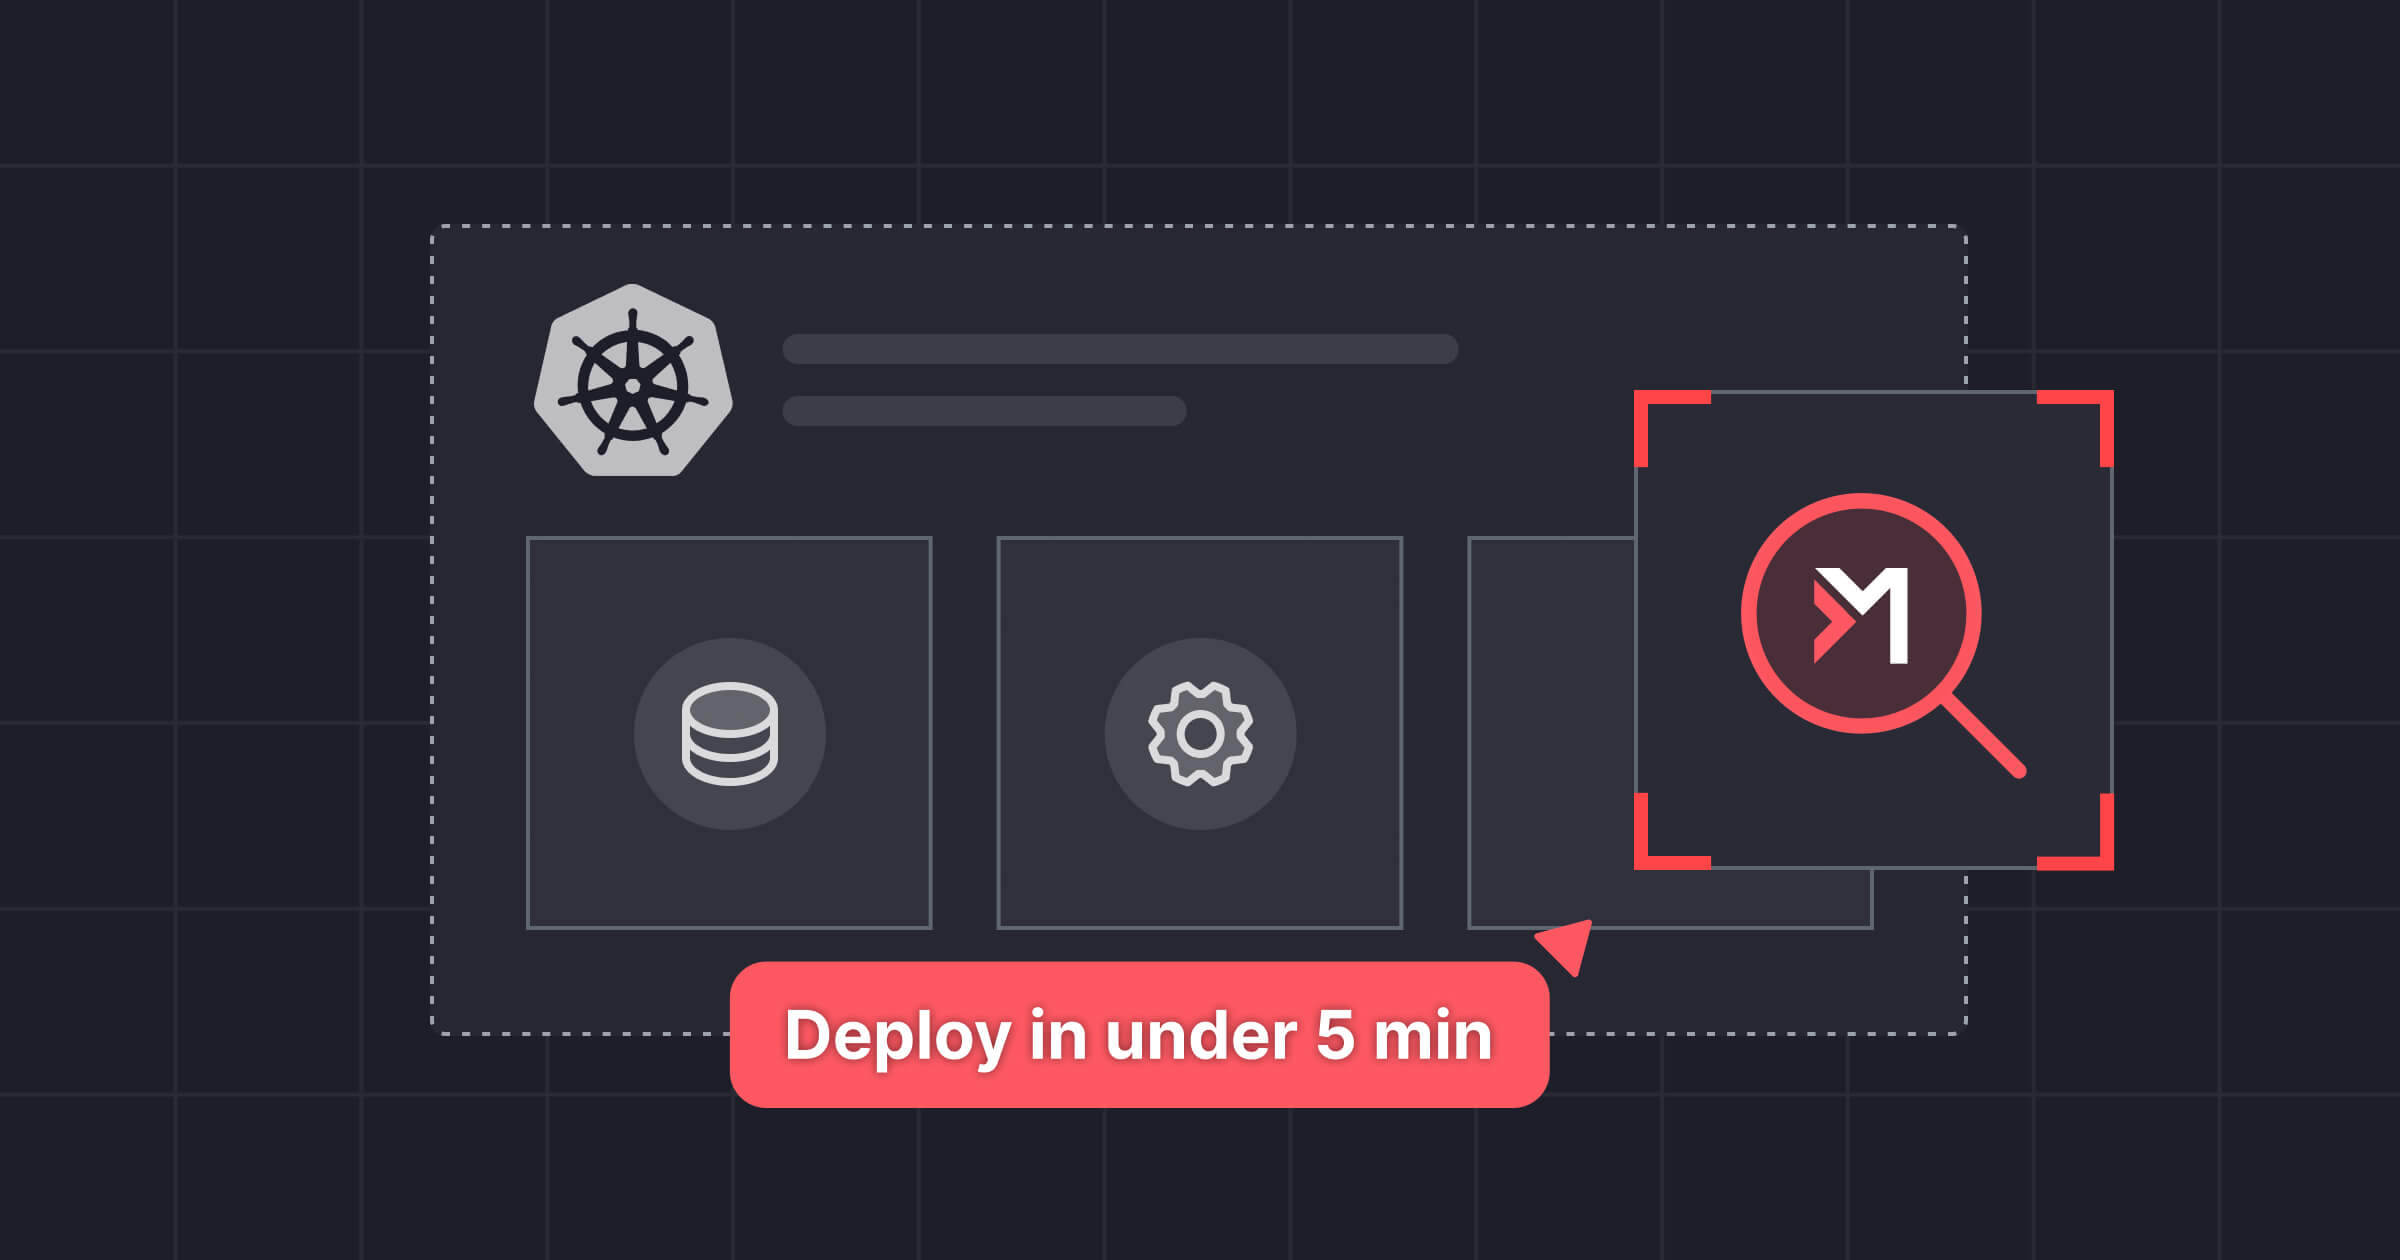
With a Kubernetes-native sensor powered by eBPF, you can go from zero to full runtime visibility in just a few minutes.
The Miggo ADR Platform helps organizations take back control at runtime. Powered by DeepTracing™, Miggo analyzes application behavior in production, identifies vulnerable paths, and enforces protection at the function level - before attackers can exploit a single flaw. These runtime signals are at the core of Miggo’s unique approach. While other tools leave you drowning in irrelevant CVEs, Miggo shows you which ones are actively in use - allowing you to focus on the 1% that matter.
This post walks you through how to install the Miggo sensor and start seeing which vulnerabilities actually matter - those that are reachable, and executed at runtime.
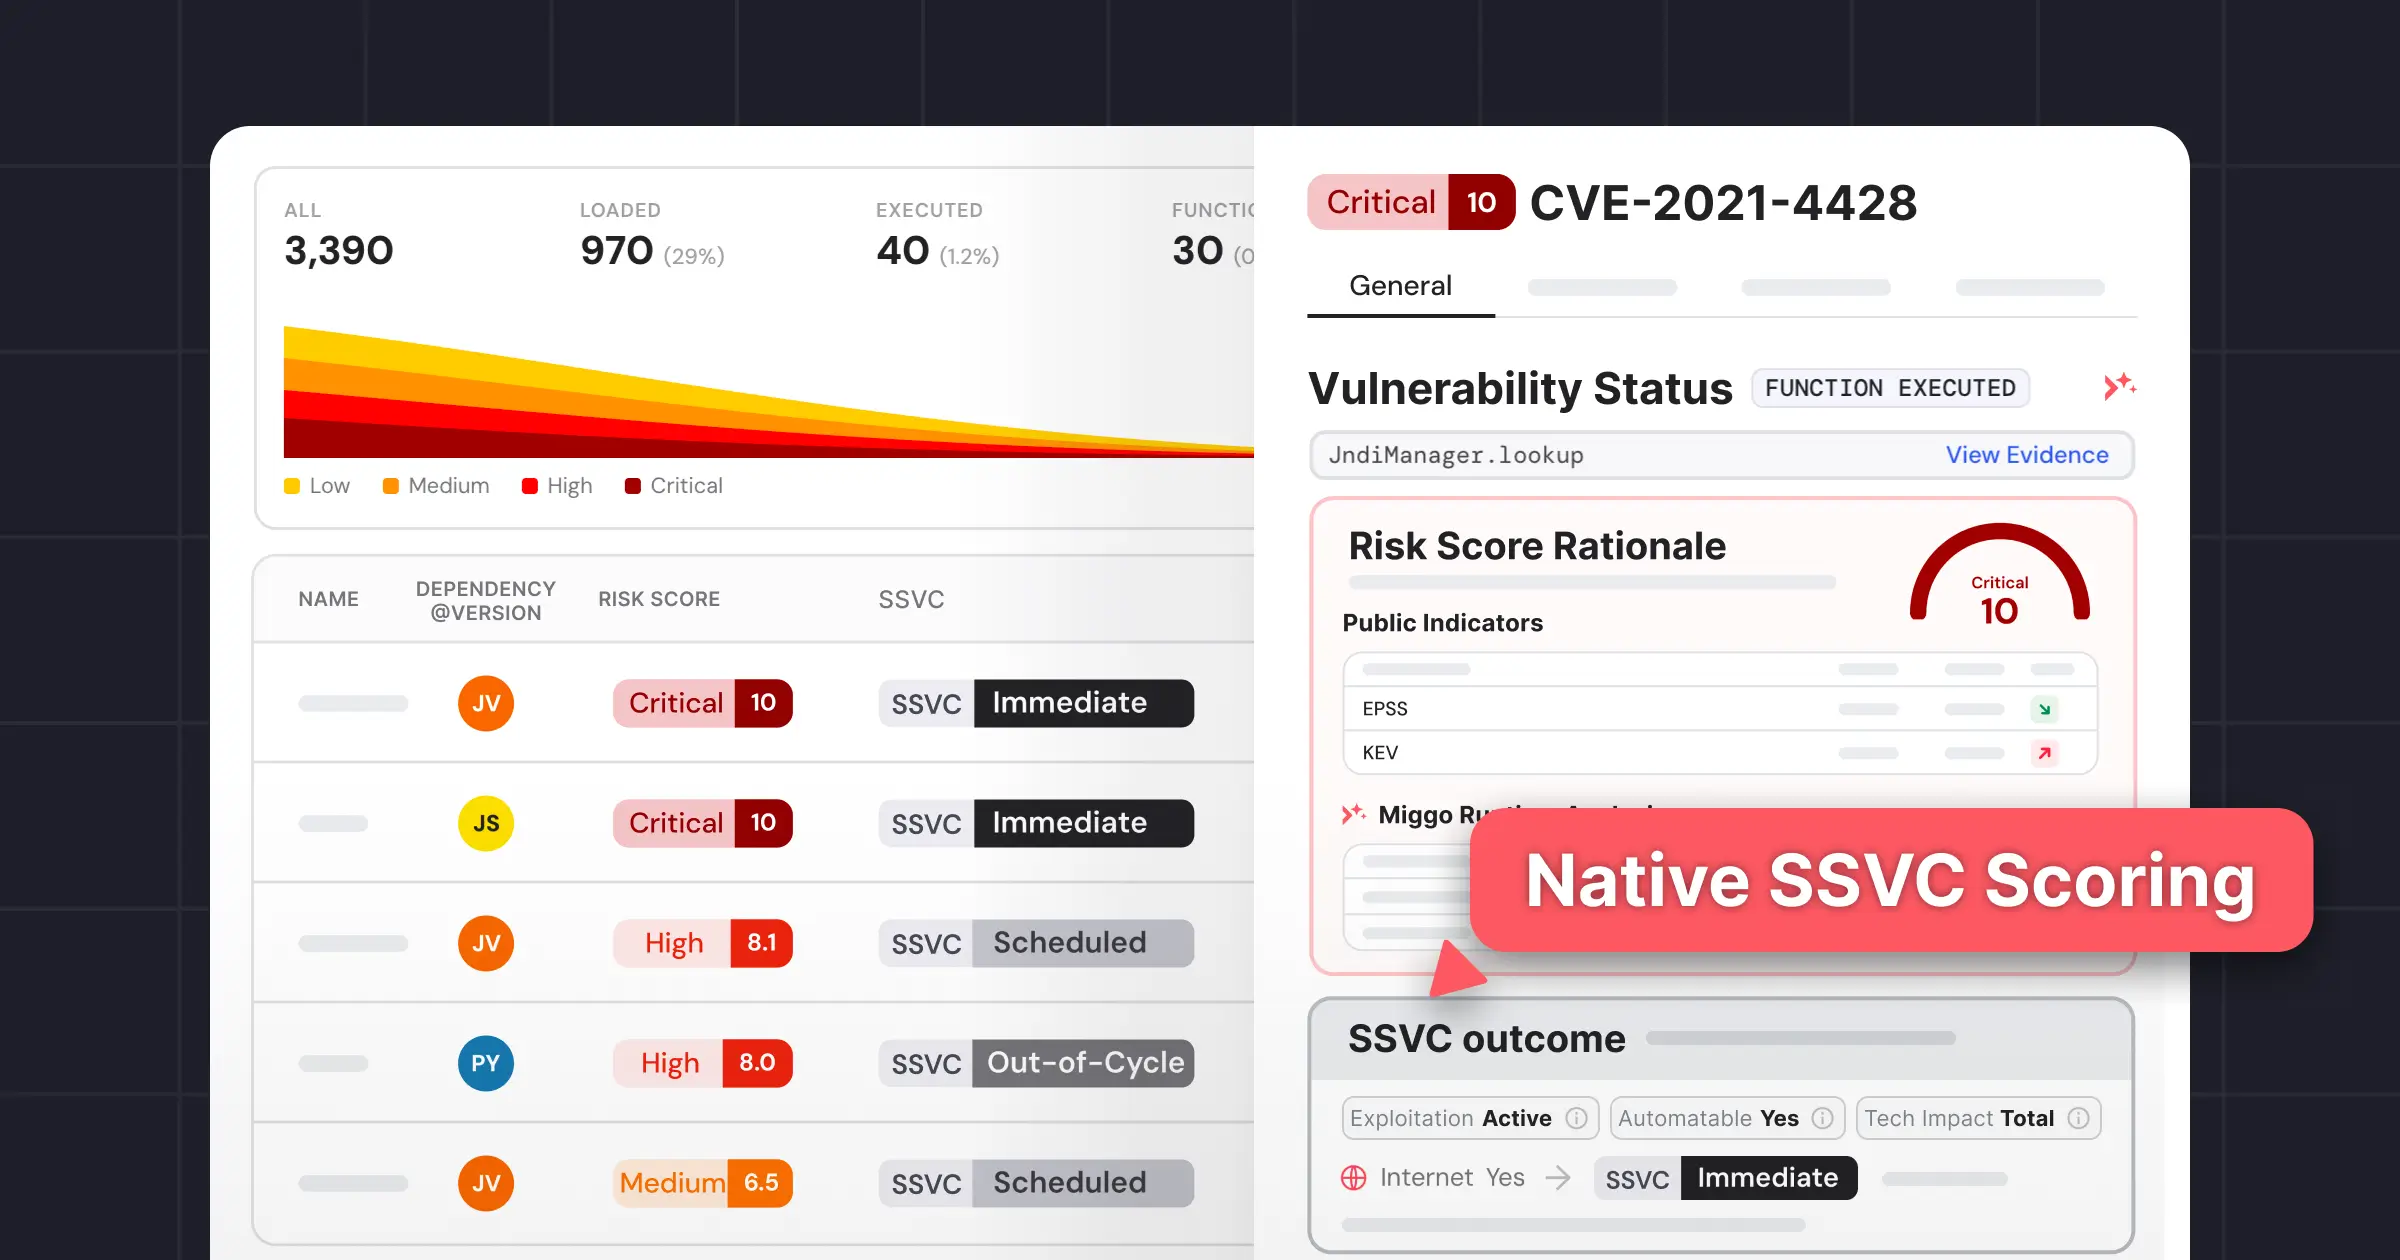
See What Actually Runs - Not Just What’s Installed
When you deploy Miggo, you’re not just monitoring infrastructure - you’re transforming how your team handles vulnerabilities.
✔️ Know if a vulnerable library is actually loaded
✔️ Know if vulnerable functions are ever invoked
✔️ Know what attackers could exploit today, not what might be risky
With runtime protection built into the application layer, Miggo eliminates unnecessary patching cycles and alert fatigue - without disrupting your developers. Sensor deployment may differ slightly by environment, but the core idea remains: installation should take minutes, not hours.
What is the Miggo Kubernetes Sensor?
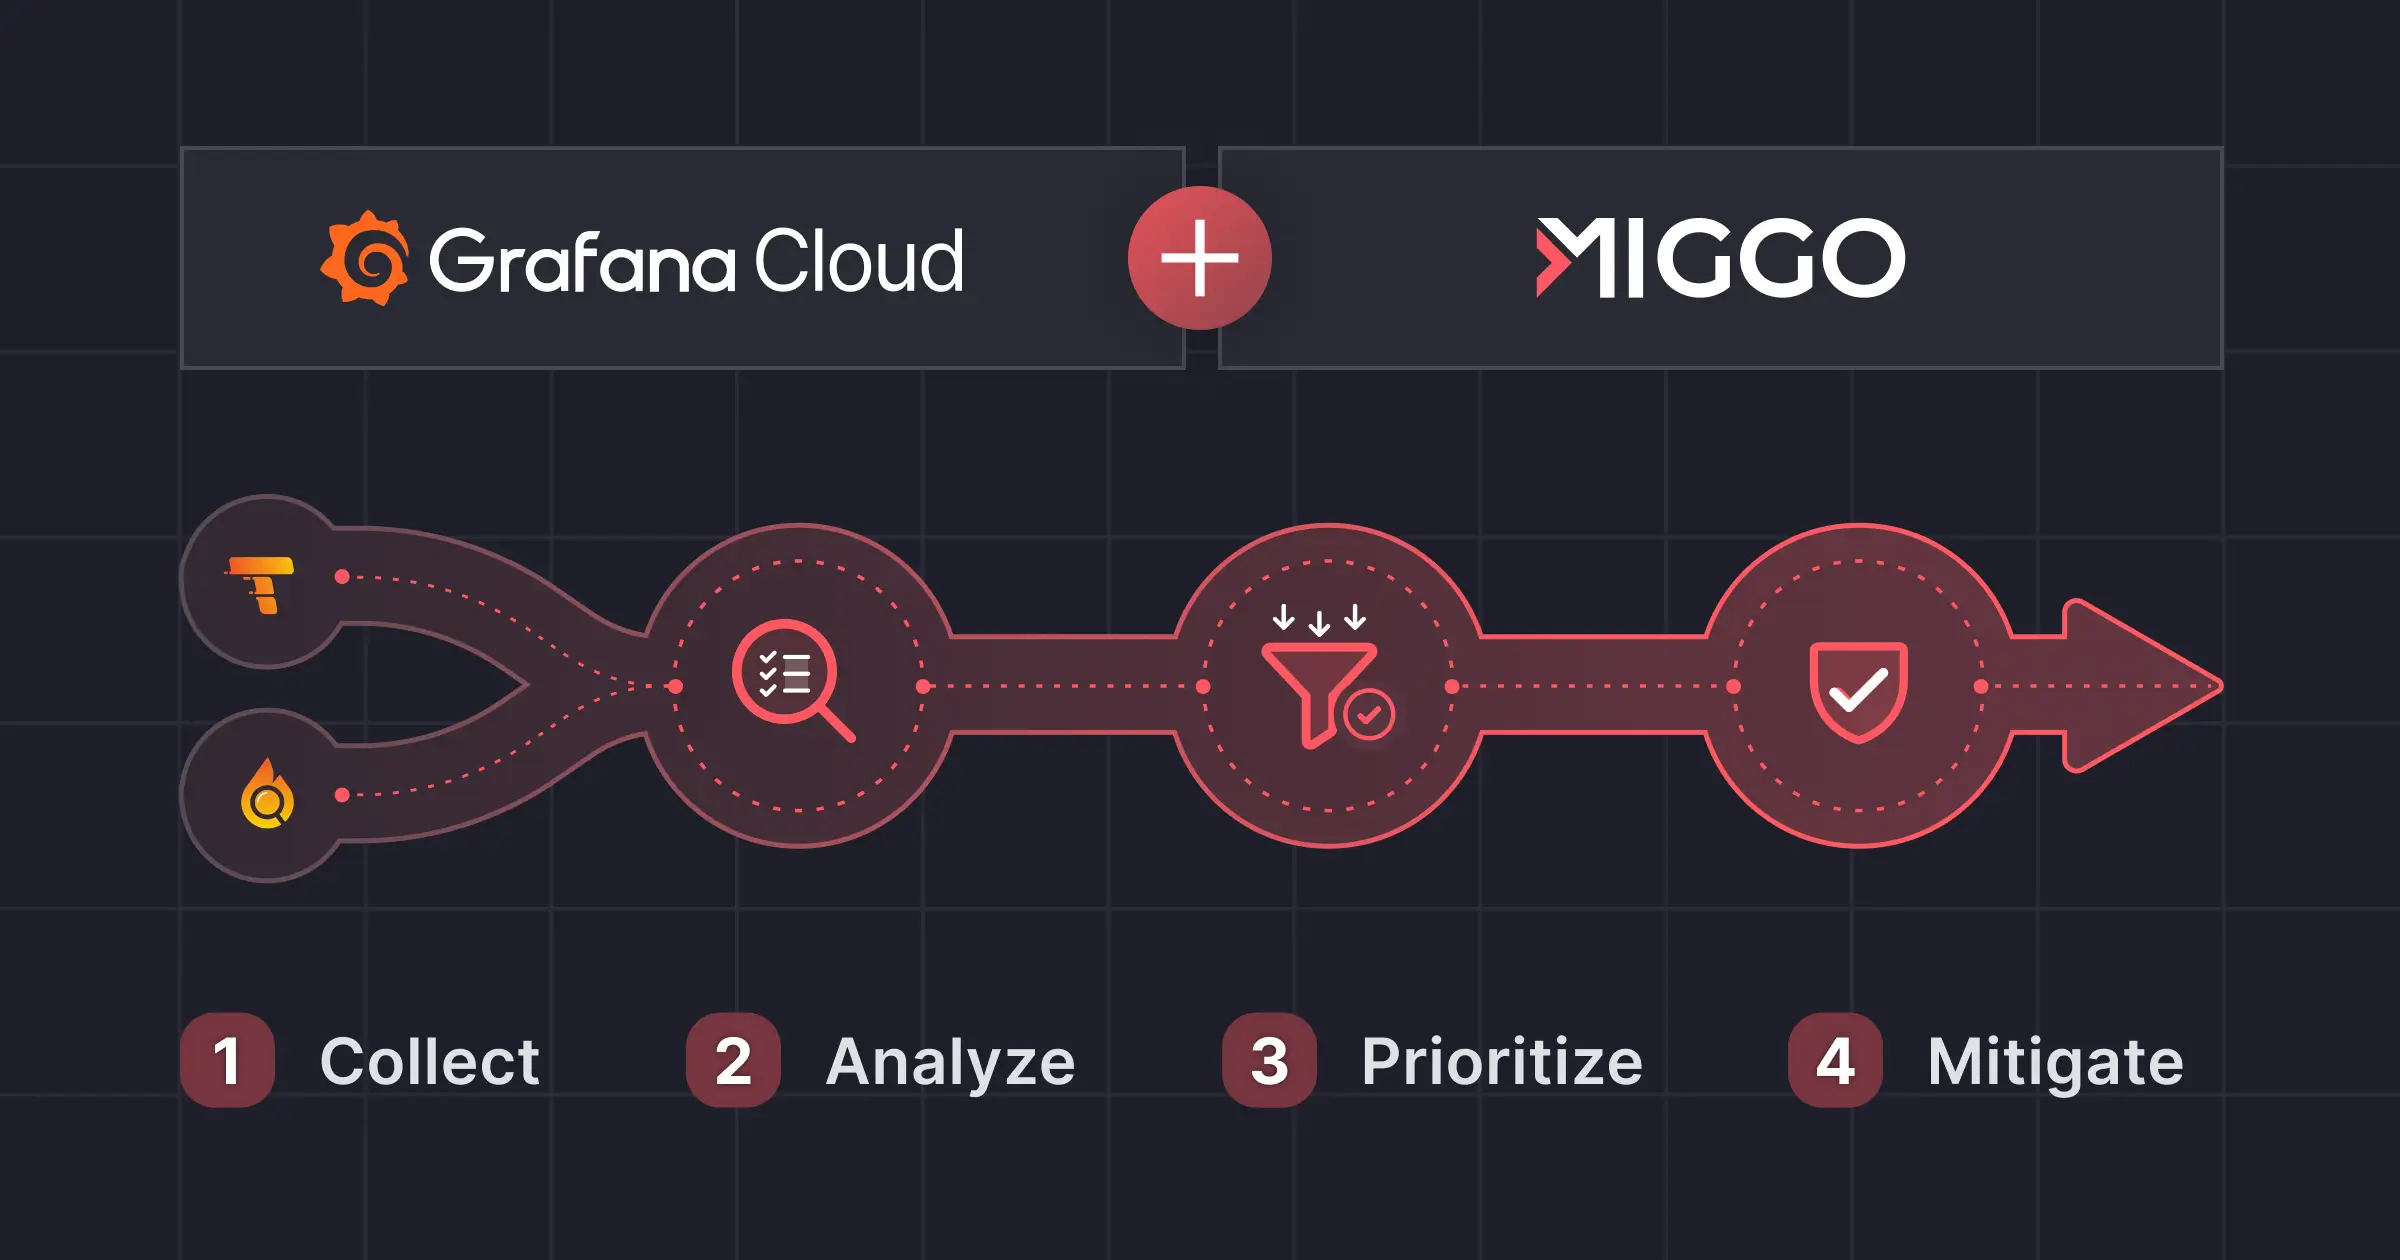
The Miggo Kubernetes Sensor is a lightweight, eBPF-powered and OpenTelemetry Collector based agent that unlocks deep visibility into both your infrastructure and application behavior. Deployed via a single Helm chart, it captures:
- Kubernetes environment context via the Miggo Watch and Miggo Collector components:
This includes details about your cluster’s workloads, configurations, namespaces, service accounts, network policies, and more - giving Miggo the infrastructure context it needs to connect vulnerabilities to the environment they run in.
- Application layer insight through Miggo Scanner and Miggo Runtime, which work in tandem to show you:
- Static presence of vulnerable dependencies (
Static) - Whether a vulnerable package is loaded into memory at runtime (
Loaded) - Whether a vulnerable package is executed at runtime (
Executed) - Whether specific vulnerable functions are ever executed by your code (
Function Executed)
- Static presence of vulnerable dependencies (
Miggo Runtime enables always-on, continuous profiling with minimal overhead on compute resources. It determines exactly which code paths and functions are being executed by your Kubernetes workloads at runtime - classifying vulnerabilities as Function Executed with stack trace evidence that pinpoints vulnerable and potentially exploitable functions.
Miggo also offers flexibility in how it integrates into your environment. You can deploy the Collector as a single global instance (Deployment) or as one per node (DaemonSet), depending on your topology and scale.
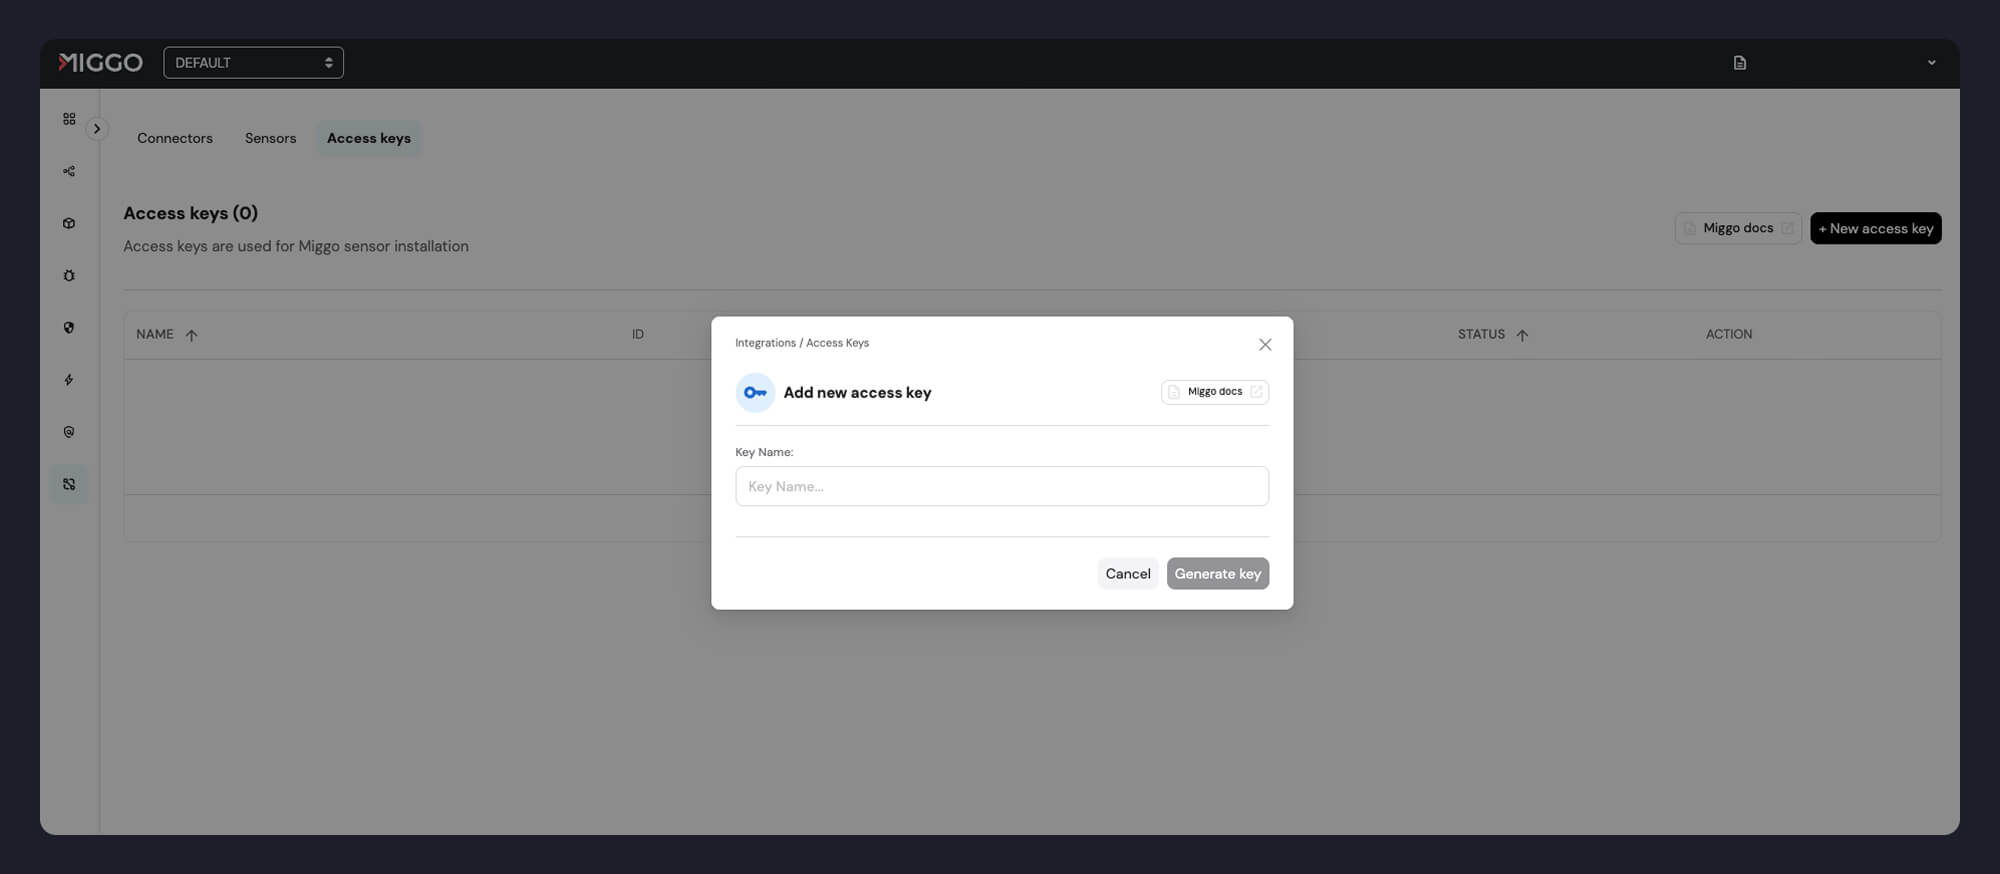
Step 1: Get an Access Key
Log into the Miggo Portal and navigate to the Integrations tab. Under Access Keys, click “+ New access key”, provide a name, and select “Generate key”.
Step 2: Prepare the Miggo Helm Chart
Add the Miggo Helm repository:
helm repo add miggo-charts https://miggo-io.github.io/miggo-helm-charts
helm repo update miggo-charts
Create a values.yaml file with your specific deployment details:
miggo:
  clusterName: "<your-cluster-name>"

config:
  accessKey: "<your-access-key>"

miggoRuntime:
  enabled: true
  profiler:
    enabled: true
Step 3: Deploy the Helm Chart
Install the Miggo sensor using:
helm install miggo miggo-charts/miggo \
  -f values.yaml \
  --namespace miggo-space \
  --create-namespace
Advanced users can configure secrets manually using Kubernetes secrets for access token and image pull credentials, but the above approach works for most deployments.
Step 4: Verify the Installation
Run the following to ensure all pods are up and running:
kubectl rollout status -n miggo-space --watch --timeout=1m \
  deployment/miggo-scanner \
  deployment/miggo-watch \
  deployment/miggo-collector
Monitor Your Sensors with Confidence
Installing the Miggo Sensor is just the start - knowing it’s working across your entire environment is what keeps teams confident and secure.
Miggo makes this simple with built-in sensor visibility. In the Sensors tab, you can view the live status of each deployed component - including Miggo Runtime, Collector, Scanner, and Watch. Each sensor is tracked by cluster and marked as Active when it's healthy and connected to the Miggo platform.
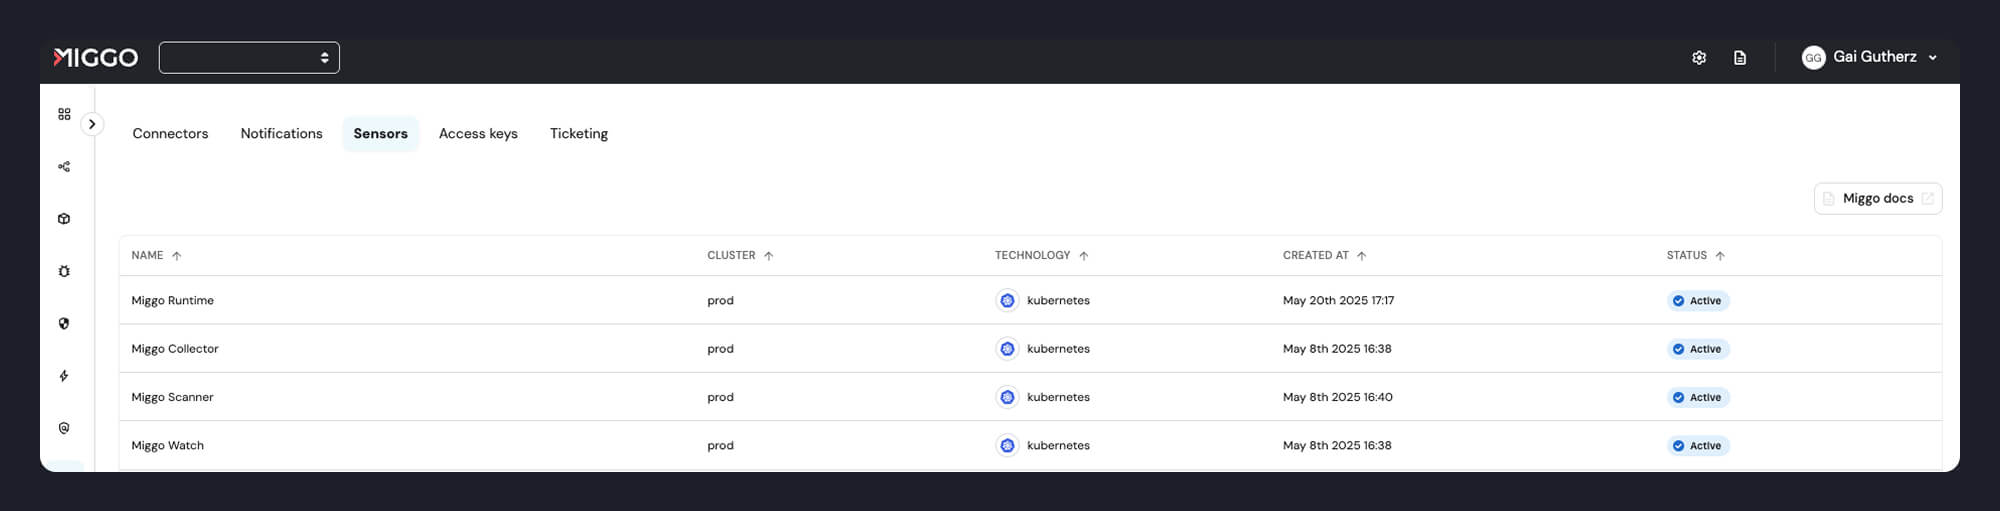
For more granular insight, you can click into any sensor to access a detailed breakdown of node-level connectivity. Miggo continuously monitors heartbeat signals from every instance, helping operations teams quickly identify disconnected nodes and ensure full runtime coverage across large environments.
No complex integrations. No guesswork. Just clear, actionable visibility into your runtime sensors.
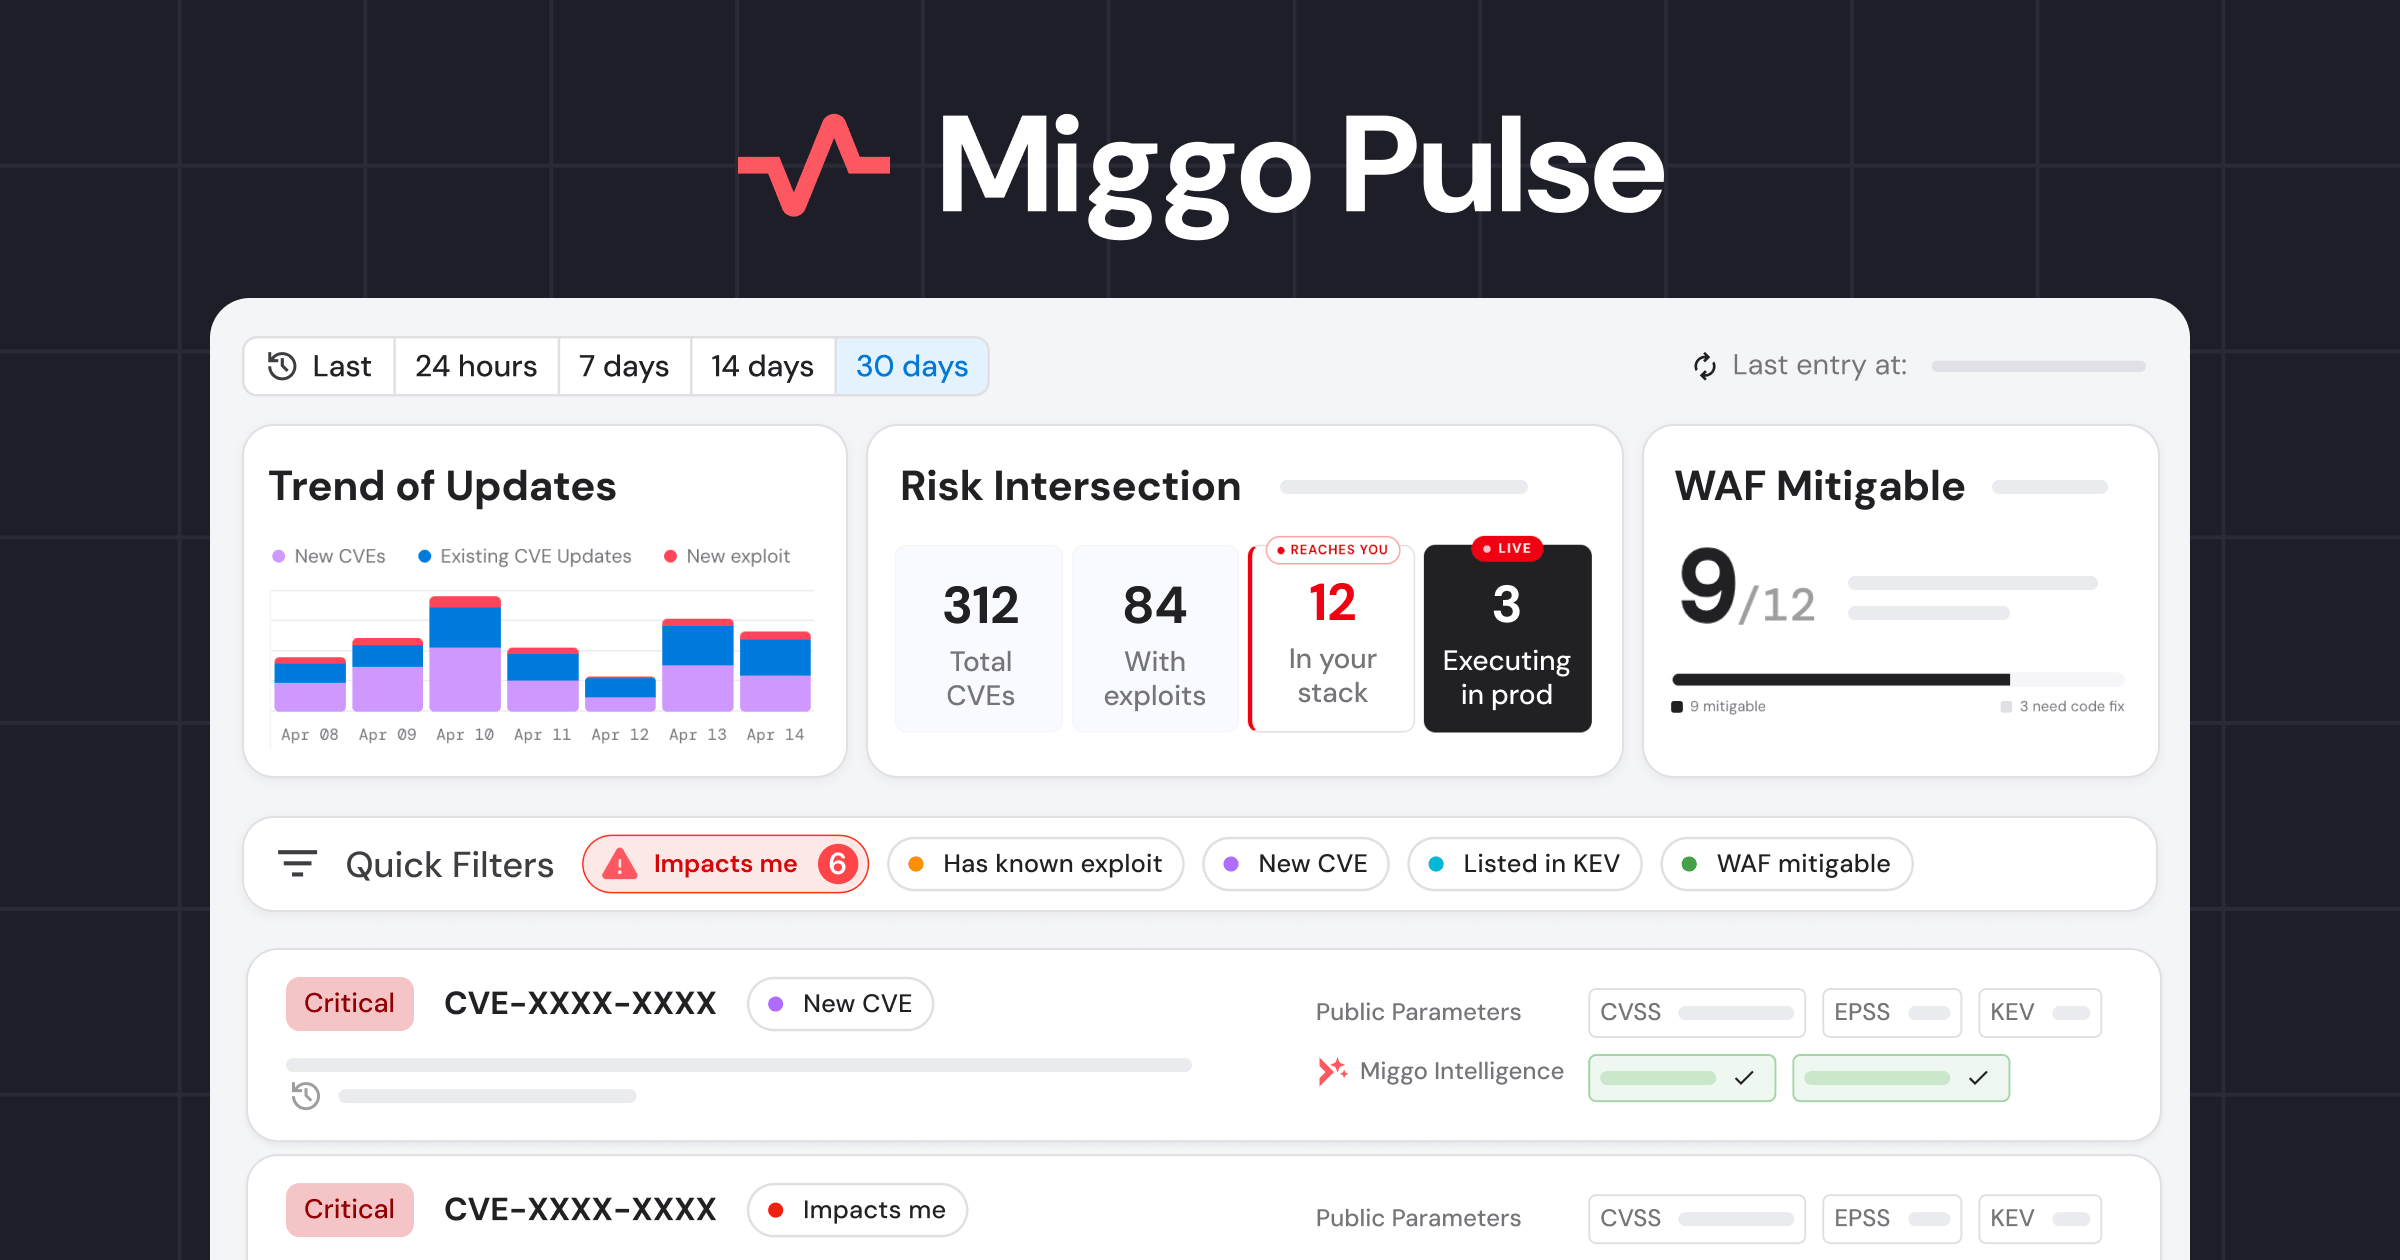
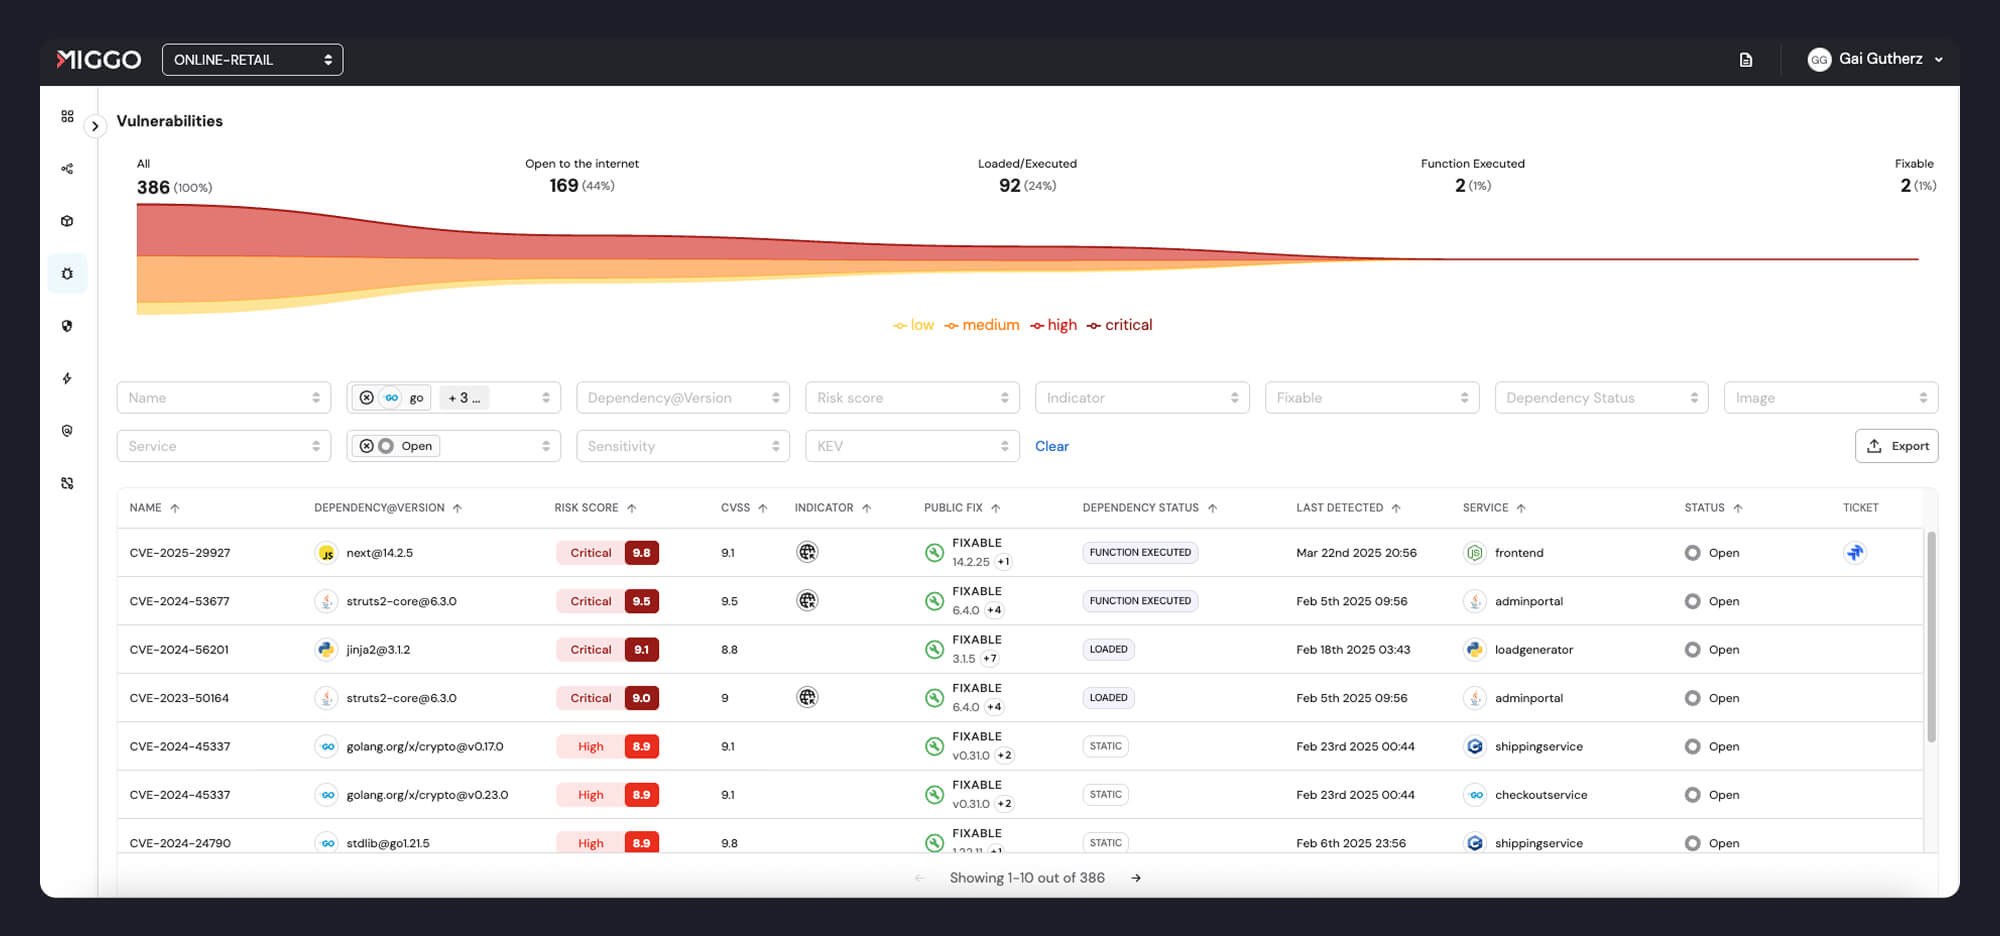
The Vulnerabilities tab complements this by showing you real-time attack paths, like open-to-internet vulnerabilities and exploitable CVEs - so you can focus on the vulnerabilities that matter within just a few minutes.
Get Started Today
Ready to stop focusing on every vulnerability and start responding to active attack paths? Book a demo today.